We’ve had our Sonos setup for nearly three years now and it continues to be a joy to own and use. Our original setup of 2 x ZP100s (the zone players with built in amplifiers) was recently added to with a third un-amp’d ZP80.
The new ZonePlayer was swapped for the ZP100 in the AV room where amplification was not required as it was already plugged into our home cinema system.
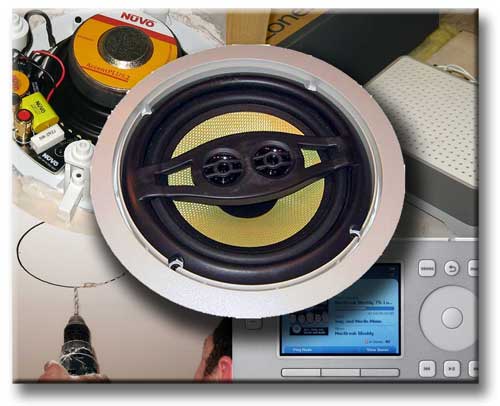
The Plan – So the plan was to utilise the now spare ZP100 as a zone in the en-suite bathroom off our main bedroom. We spoke to Steve at i-Home and for our purposes he recommended the Nuvo AccentPLUS2 NV-AP26CS ceiling speaker at £130 (the PLUS1 range is available at around 25% less).
This speaker uses a single Kevlar coned 6.5″ woofer with a butyl rubber surround and two mid-high range tweeters slung across the front. This gives the advantage of providing a stereo sound from a single enclosure, ideal for our size of room and also relative immunity to the moisture it will encounter.
 |
 |
The Installation – We knew we wanted the speaker sited centrally in the room but this this depended on where the rafters were above. Luckily we have a loft above the bathroom and so access above the ceiling was not a problem. We found the appropriate spot above the ceiling and drilled a small hole down with a fine bit. We were then able to gauge from below where the speaker could go.
For smaller sized speakers a hole saw is very useful, but this enclosure needs an 8″ opening. The speaker comes with a cardboard template and we simply drew around that and then drilled up multiple times around the ring. We then inserted a hacksaw blade and sawed round to join up the holes. Easy.

The speaker is then inserted from below. The little lugs then swing out and are screwed down to grip the plaster board. You really need two people for this operation, one holding the speaker from below and screwing it up, the other above to turn the lugs out and to make sure they aren’t over tightened. It’s important not to over tighten the lugs in case they break or you damage the plaster board.

Once installed it’s a simple matter of running speaker wires to the ZP100. Oh, and the socket I had asked the sparks to fit in the loft when we were building 9 years ago “just in case” now has a use!
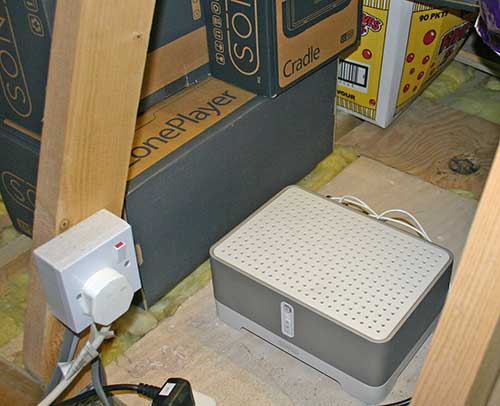
Irony: ZP100 rejoins the Sonos box it arrived in 3 years ago in the loft
We re-covered the back of the speaker on the loft side with insulation which helps to increase the bass response from the unit. £20 would add an X10 appliance module to the Sonos’ power socket, allowing it to be easily turned off without having to go into the loft each time. We could add a scheduled event to HomeVision to reboot the ZonePlayer once a month, shut it down every night, or simply add it to the list of devices that gets turned off when the house enters Holiday mode. The options are endless.

Speaker Installed : Grill Installed, Job Done.
On the bathroom side the speaker grill simply pushes into place. It’s “paintable” grill is supplied white so suited our ceilings without any more work.
In Use – The Sonos CR100 controller is fitted with gaskets and described as “splash proof” so it’s relatively safe to use in a bathroom providing it doesn’t get a soaking. One of our readers has added low voltage switches around his bath to provide basic music control and this can be achieved with Sonos through a central controller and the using the third party web control app. This could provide controls like volume up/down, next/previous track etc.

In reality we’ve used the controller to simply kick off a playlist, before you enter the room. You can’t beat a relaxing bath whilst listening to the latest episode of our favourite podcast and even SWMBO enjoys bathing to her favourite tunes.
Using the Sonos alarm function means our mornings now start off with the BBC News streaming radio automatically playing in the bathroom, turning itself off automatically after 45 minutes.
The speaker sounds sweet and it’s definitely a different animal to the tinny £20 supermarket jobs. Bass response is good and playing with the balance shows just how good the stereo image is from a single enclosure.
Adding a Sonos zone to your bathroom is an ideal home automation project for a weekend or evening and one that makes life just that little bit more civilised. Recommended!
No products found.
Buy the Sonos range Here
Last update on 2024-11-11 / Affiliate links / Images from Amazon Product Advertising API
Can I use wireless Bluetooth speakers with this controler
Does it display a clock ?
I have Sonos for around 6 years, Play 5, ZP100, playbar etc. Everything apart from digital radio, perfect. Decided to refurbish bathroom (all tiled 4m x 2M,)installed Monitor 165 T2 speaker in ceiling centre using Sonos Connect Amp. I find that sound is very Tinny especially vocals. The bathroom is below a bedroom, the speaker is fitted in cavity between. I have set Bass to +10 and Treble to -10 on controller which has improved it but not as good as I would like. Any ideas, without major surgery? improve sound quality?