Fibaro Door/Window Sensor (FGK101-107)
First off, we must don our festive hats to Fibaro and congratulate them for winning the Best Gadget of the Year 2012, as voted for by the audience of the Polish Men’s Stuff Awards. “An essential product for every man,” apparently.
The sensor
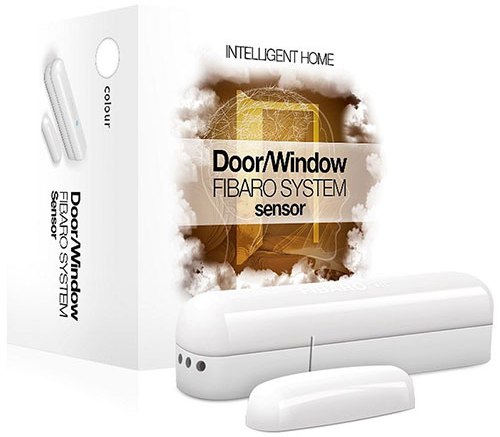
In this review I’ll be examining the Fibaro Door/Window Sensor (FGK101), which is the White version of their Z-Wave enabled magnetic reed-switch sensor, which is also available in black (FGK102), silver (FGK103), light brown (you get the idea), grey, brown, and dark brown. Or if you prefer, 4 shades of grey and three shades of brown. Presumably there are a lot of lovely natural wood interiors in Fibaro’s native land.
This sensor has been mooted for a while, and was hotly anticipated (by me, at least) thanks to a number of issues I’d been having with a certain manufacturer’s Z-Wave door/window sensors – the issues being that they were poorly implemented, badly designed, and utterly unreliable.
To preserve modesty, I shall refer to them only by alias, let’s say “ServerPing Inc”. In fairness to ServerPing Inc, it looks like you can’t actually buy the particular model of sensor that so irked me any longer: they’ve replaced it with a newer model, presumably after howls of protest from the angry mob. Friends report that the new model works fine.
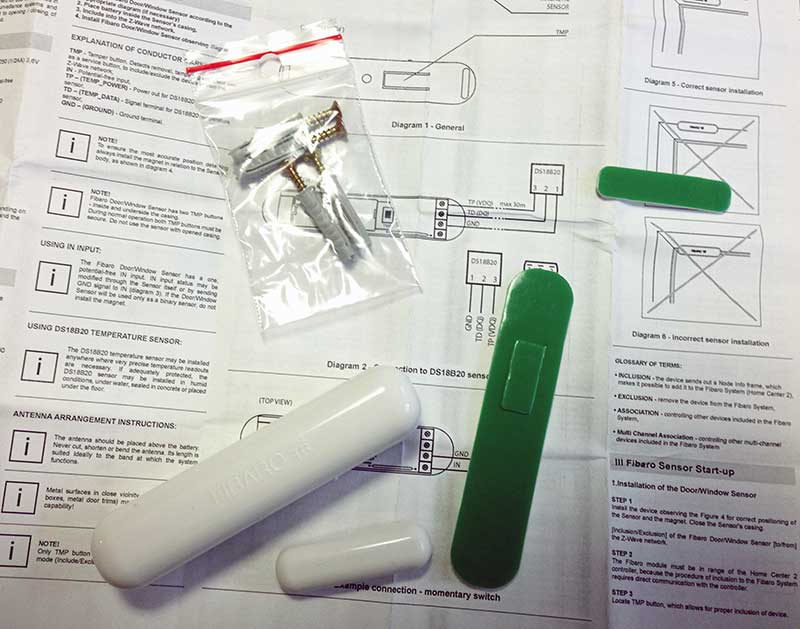
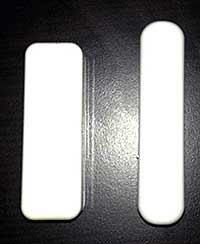 The Fibaro door/window sensor is a sturdy, discrete little unit, measuring just 76x17x19mm, and comes with an accompanying magnet, some double-sided sticky pads and a set of screws and wall-plugs for the truly determined. For comparison, it’s a shade longer than the equivalent AlertMe sensor, but not as wide, and about the same height – in the picture, the Fibaro sensor is the one on the right.
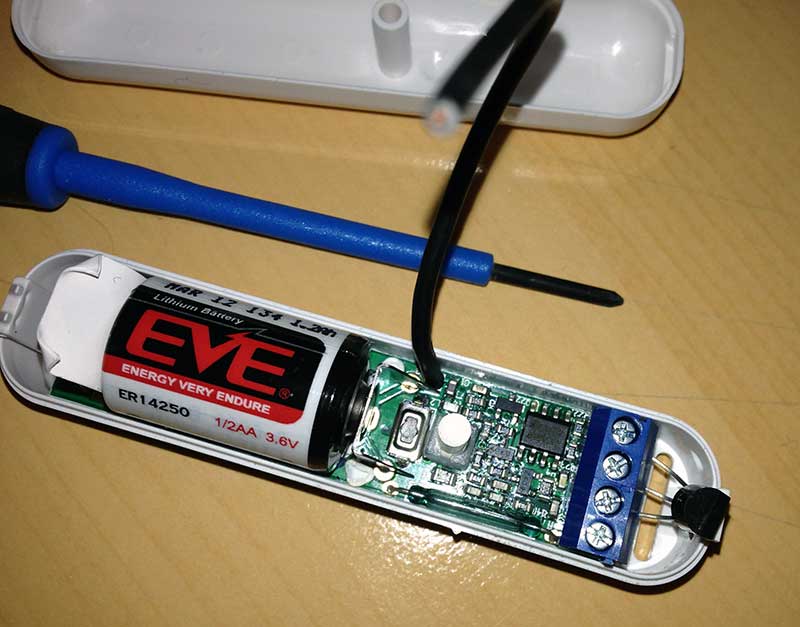
A consequence of its diminutive size is that it uses a peculiar ER14250 1/2AA 3.6V battery. One is included with the package, isolated by a little cardboard strip that must be removed before operation. Spare batteries go for about 3 quid a pop at all the usual places. They’ve mounted the PCB to the case by deforming the plastic stand-offs, so it’s not wise to try to remove it. You can get at the mounting holes by removing the battery. There are two tamper switches, one for the top lid and one to detect removal from the surface it’s mounted to, a blue LED, a reed-switch that senses the attached magnet, and a small terminal block at one end.
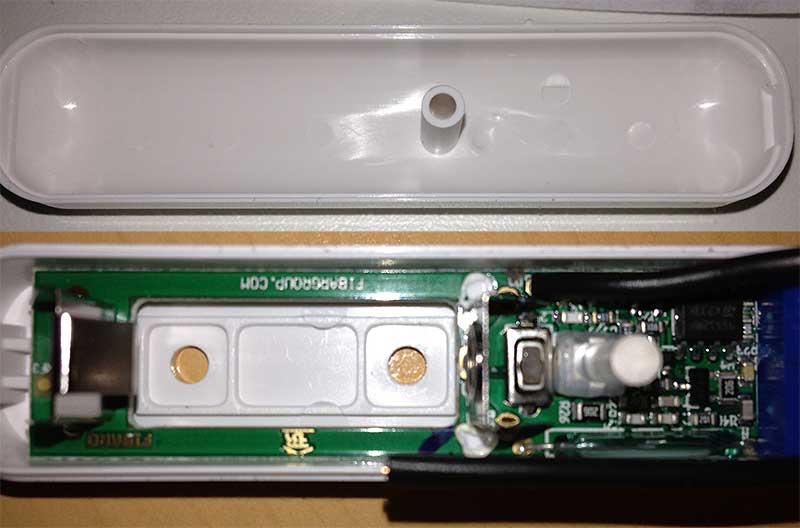
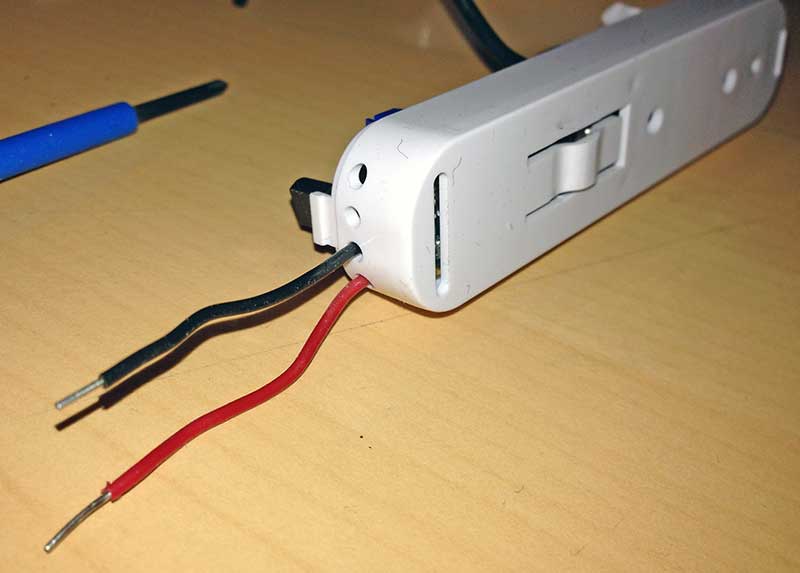
The terminal block is intended to take a Dallas One-Wire DS18B20 temperature sensor, which isn’t included, and it also provides a volt-free interface to an external switch. It’s a bit fiddly getting the DS18B20 inside the case, I’m guessing from the 4 holes they’ve helpfully provided in the end and the slot that’s milled out of the bottom that you’re maybe meant to mount it externally, but in my opinion that would look a bit daft. For wires to an external switch though, it’s extremely helpful. The right-hand image above also shows the plastic cover of the tamper switch that detects if the sensor is removed from its surface.
One minor disappointment is that the external wired switch is not a separate input, it’s actually wired in parallel with the reed-switch, so you can’t use one unit as both your front door sensor and as an interface to the doorbell, for example. If you’re using the external connection, you have to make sure that the magnet is nowhere near the sensor, as its presence will short out whatever external thing you’re hoping to detect and you won’t see any events from it.
The external sensor contacts might prove useful if you wanted to interface to an external, weather-proof reed-switch sensor, on a garden gate, for example. Thus this sensor can be used as a battery-operated version of Fibaro’s Universal Sensor, albeit one that only handles a single input and a single temperature sensor (and can be spoofed with a magnet).
Installation
In the left-most picture, you can see the AlertMe sensor at the top, the ServerPing sensor in the middle, and the Fibaro sensor at the bottom. This neatly illustrates the PVC Problem, which is that on my PVC doors the deep 45 degree chamfered edges means that it’s impossible to get the magnet near the sensor. In the end I elected to replace my venerable old AlertMe sensor with the Fibaro and re-use the old magnet. This particular approach has served me well in the past, and is incidentally one of the few known practical uses of a BCS membership card.
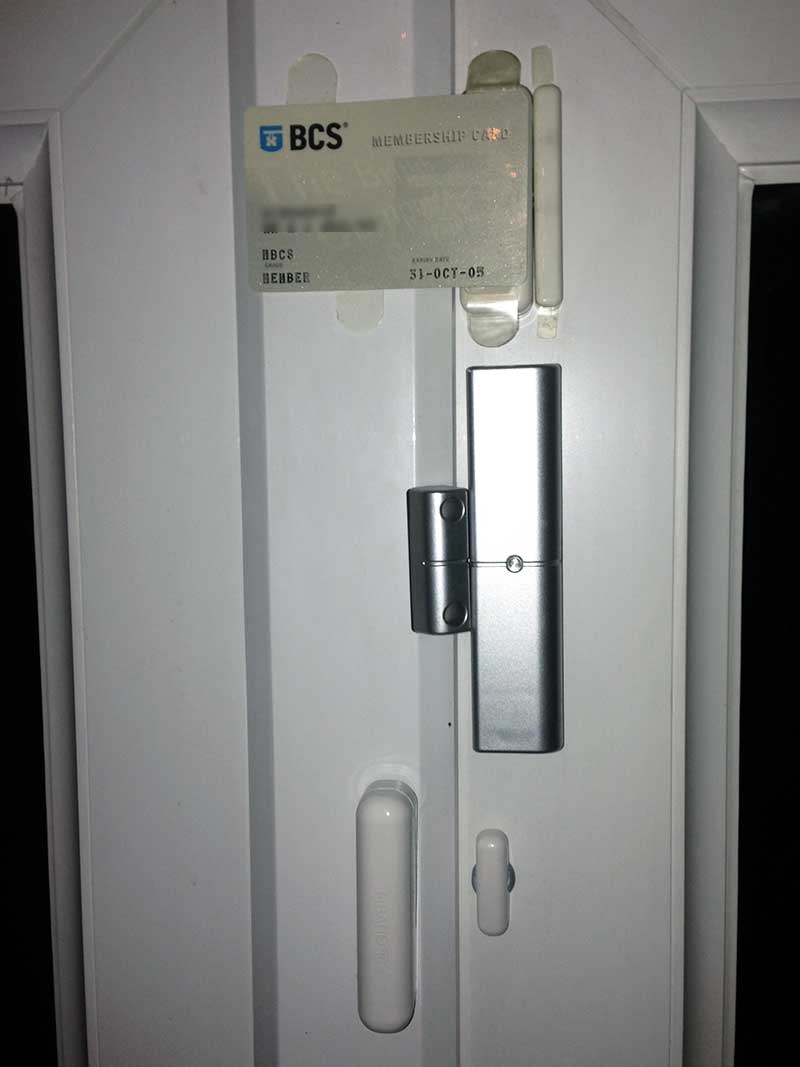
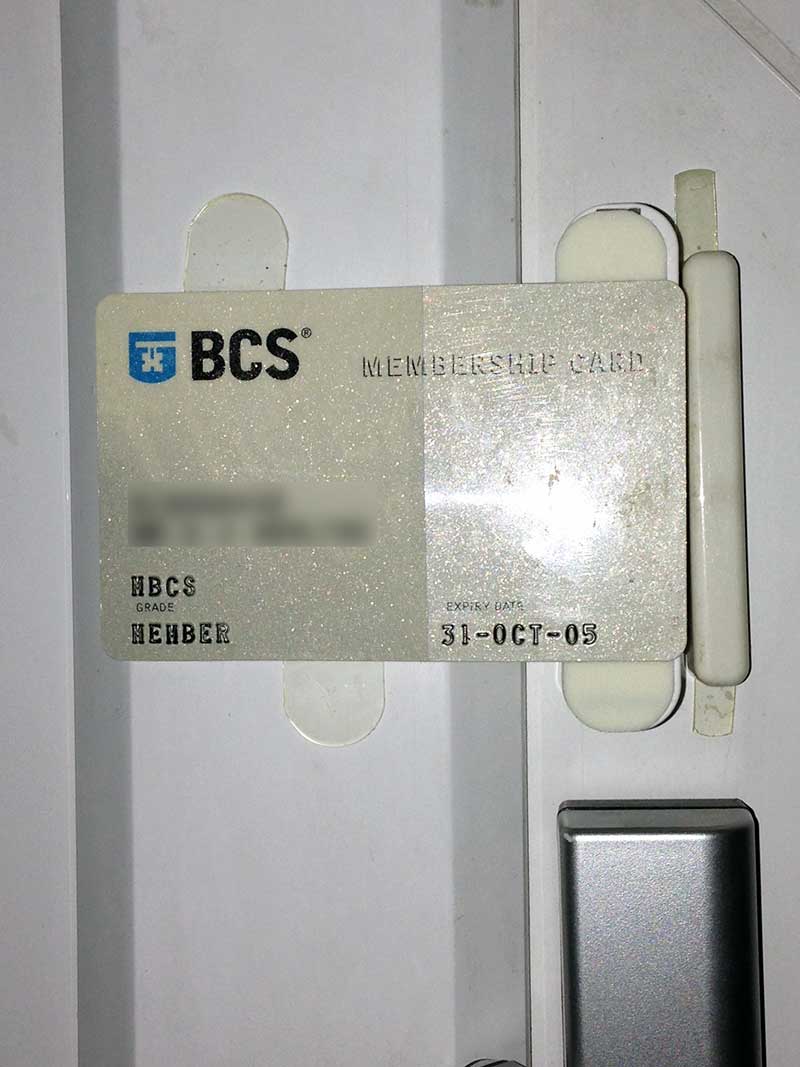
Fibaro state that the magnet must be no more than 5mm from the sensor housing, although mine had an effective detection distance of about 15mm, so I could have taken an approach like I did with the hateful ServerPing, but I don’t particularly like having the magnet jutting out like that (and the ServerPing would have performed equally well if I’d gaffer-taped it to one of the moons of Jupiter).
Before installing the sensor on the Home Centre 2, I took the liberty of upgrading to their 1.044 software release, as Fibaro generally make great strides with each release. Existing HC2ers will be excited to hear that this release includes the return of the option to try the beta of their new system software, something which I hope to cover in a future article.
Adding the door/window sensor to the system is as simple as putting the HC2 into pairing mode, and then clicking the tamper switch three times. You can use the external tamper switch, if you haven’t mounted your sensor to a doorway yet, or the internal one if you have. A nice bit of attention to detail that manufacturers of other, shoddier Z-Wave kit would do well to emulate.
Once the device is paired, you give it a name, assign it to a room, and Bob’s your uncle. Because it’s a multifunction or ‘composite’ sensor it actually appears as three devices, which is mildly perplexing. You get the two ‘end points’ that do the actual sensing (the temperature sensor and the reed switch), and a ‘master’ device that encapsulates them all, and also shows battery status, as well as duplicating the arm/disarm buttons. In my opinion, this layout wastes space, and is not particularly helpful. You could just as well add the battery icon to both endpoints and get exactly the same functionality. It’s not as if moving the master device to a different room brings the slave devices with it either, you have to do each independently, which makes no sense at all.
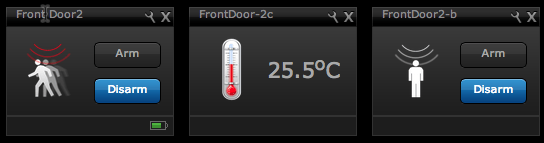
There are some other weirdnesses with the user interface. The HC2 has a category of sensors called “door/window”, but this sensor shows up as a “motion sensor” (ie, like a Passive Infra-red sensor), as you can see from the icon. You can manually change the icon so it looks more appealing, but this mis-classification means that the door sensor shows up in the wrong panel on the iPhone app.
Also, while the master device (on the left in the picture, icon active) shows the actual status of the door, the slave device (on the right in the picture, icon inactive) never changes, making me wonder what the point of it is, exactly. But if you delete it, because it’s cluttering up your UI and not actually doing anything, then the sensor stops working, and you have to delete the whole lot and start over. Bonkers.
 Something that may startle you when you first install the sensor is that you don’t get the standard temperature icon, like the picture above: instead you’ll get the generic cardboard box icon, which is generally indicative of the HC2 not having recognised the device. Don’t panic! This will correct itself once the sensor sends its first temperature reading. To conserve battery life it only sends the temperature at a periodic and relatively long interval, which you can configure from the settings page.
Speaking of settings, I was relishing the thought of going into the Advanced tab and having a good tinker, as Fibaro have a reputation of providing an absolute battery of configuration options for their own devices. No such luck this time though, just a message that says “Parameter template will be added soon”, which is disappointing when you consider that they control both ends of the system. You can configure the temperature reporting rate though, which defaults to 4000 seconds, and also set up three Association Groups, which is Z-Wave speak for “things this sensor can turn on and off directly without involving the central controller”.
In use
So far, the Fibaro sensor has performed admirably. It’s been working for two days now and is still reporting events to the HC2, smashing the previous record for Z-Wave door/window RF endurance in our house by a good 47 hours or so.
In conclusion
This unit is well made, and has the attention to detail that I’ve come to expect from Fibaro. Crucially, it also seems to bring an element of reliability to this particular niche that’s been sorely missing. It’s slightly more expensive than competing offerings, but it’s considerably smaller, offers more functionality (temperature sensor, external contacts), has better integration with the Fibaro system and stands a chance of still doing its job long after competing products have been reduced to an expensive means of flashing an LED on and off. When it comes to Z-Wave door/window sensors, you definitely get what you pay for, it seems. And with a wide choice of browns to choose from, there’s something for everyone. The software integration is not quite as polished (sorry, couldn’t resist) as you might expect from Fibaro, but I expect they’ll fix this very quickly indeed, if past experience is anything to go by. Thus far, it is in my opinion by far and away the best Z-Wave door/window sensor available, amidst admittedly limp competition.
No products found.
Last update on 2024-11-11 / Affiliate links / Images from Amazon Product Advertising API
To be fair to “ServerPing” (I recognise the model from the pic) I’ve had several of these units operating flawlessly with my MCV Vera HA system for well over a year, so I guess you’ve been unlucky with yours.
Hi,
you write that you can use the front Tamper switch to associate the sensor with HC2 if you have already mounted it, but in my experience this doesn’t work: if the sensor is mounted, the rear TMP switch is kept pressed and pressing the front switch 3 times doesn’t trigger association.
So, I think that a good piece of advice is to always associate the sensor BEFORE mounting it.
Br
Riccardo
Hello
I have bought many door/ windows switch and also the universal sensor.
My problem is to get the correct status into Homeseer….
Any help ?
jk
Hi, Jonny,
You mean you want to enroll the switches to control panel? You can set the panel at detector enroll status, then trigger the switches. Generally, door/window contact is sending fixed code and easy to be learnt.
I too recognise the silver ‘ServerPing’ contact sensor and have had two of them working faultlessly for several years now with my Vera Lite.