Readers of my previous articles may recall my search for a solution to the hall / landing lighting problem for which my favourite X10 module, the LW10U X10 Wallswitch is sadly unsuitable because of the dual switching required. My solution was to use PLM02 / SL575 Screw-in lamp modules, a TM12 RF Receiver and SS13E RF stick-on switches.
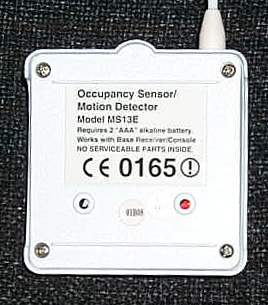
I settled on the MS13E Occupancy Sensor / Motion Detector. It’s a PIR detector, of the sort made ubiquitous by alarm systems, with the distinction that it’s battery powered (2xAAA cells) and signals the existing TM12 RF receiver thus requiring no wires, and “no wires” is always a big selling point where I’m concerned.
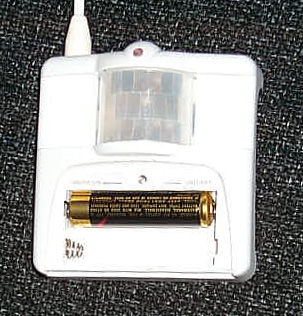
The modules are impressively tiny, as can be seen from the photos at LetsAutomate. Figuring out how to install the batteries is not entirely obvious, and I was eagerly prising away at the battery compartment until it occurred to me that there might be a screw holding it in place. Whilst researching the links for this article I noticed an idiot’s guide to precisely this problem. D’oh!

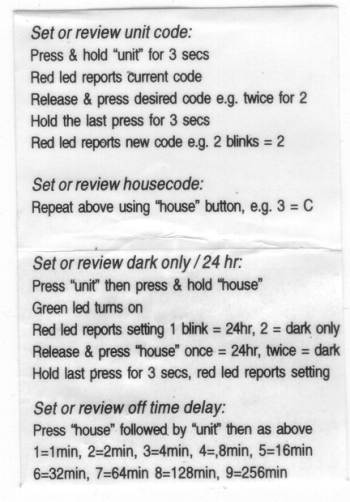
The MS13E comes with a huge multi-language pamphlet, but I’ll save you some time now by telling you that there’s not a single mention of the MS13E in the entire thing. Instead, as a reward to successfully figuring out how to open the battery compartment, there are some device-specific instructions glued inside. If you’re the sort that likes to flick forward to read the ending of a book first, you can peruse the Scan I made of them
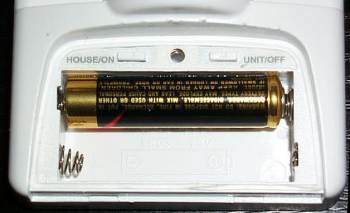
Once the batteries are in, it’s time to set the house and unit codes which the device will use. This is done using the now familiar press and hold technique, whilst observing the baleful blinking of an LED. Fiddly and frequently frustrating, but something that hopefully doesn’t need to be done too often, and goes someway to reducing the cost of the unit. Simply pressing the ON or OFF buttons will send the corresponding command on the currently configured house and address codes. Useful for debugging, but otherwise entirely useless as these buttons would normally be concealed by the battery cover, and in most installations I’d expect the entire unit to be mounted out of reach anyway.
In addition to the house and unit code, you can also select whether the MS13E PIR will trigger in darkness only (the Dark setting) or whether it operates irrespective of ambient light levels (the 24hr setting). More on that later. You can also set the dwell time for the unit at 1, 2, 4, 8, 16, 32, 64, 128 or 256 minutes. This is the period the unit will wait before sending an OFF code after it has detected movement and sent the appropriate ON code. There is no setting for never sending an OFF code.
Two fixing screws are provided, which is a bit permanent for my liking, so I opted instead to use Velcro. While finding the optimal position for the sensors though I used huge gobs of BluTak. The PIR has a reasonable detection range, I would estimate that it’s about 6m or so, with roughly a 120 degree horizontal sweep and 45 degree vertical sweep, but don’t quote me. The sensor has an 8 second detection window: that is, once it has triggered, it won’t trigger again for another 8 seconds. The red LED on the top of the unit flashes when the MS13E has detected motion and is sending X10 RF code sequences, and there’s a green LED behind the PIR mounting which appears to flash when the unit has detected some motion but not enough to cause it to send the codes.
The antenna for the MS13E is a single strand of insulated wire, which you can either wrap around or tuck behind the unit, or you can use the included antenna tube to keep it straight and improve range, although this does make the unit somewhat more conspicuous.
A minor annoyance is that the back of the sensor is flat, unlike some PIRs which are angled to allow them to be installed in corners. I plan to fashion a small mounting bracket for this purpose, which will also give some control over how the units are tilted.
Once I’d set my units up to control the landing light on address A2 and the hall light on address A3, I started leaping about like an idiot, wildly gesticulating in their general direction. Everything seemed to be working according to plan, the MS13E was detecting my gyrations with ease. Shouts of annoyance from downstairs however quickly alerted me that all was not well. Every time the upstairs MS13E triggered, it switched on the landing light as expected. But it also switched off the hall light 3 seconds later. After the 1 minute delay I’d configured it for, it switched off the landing light, and then mysteriously, three seconds later, it switched the downstairs hall light back on again!
Firing up my trusty Linux TW7223 monitor, I attempted to diagnose the problem. Sure enough, triggering the PIR caused it to send A2 ON, pause three seconds, then send A3 OFF. A minute later it sent A2 OFF, paused three seconds, then sent A3 ON. Even more bizarrely, sending A2 ON from the console also caused an A3 OFF shortly afterwards! Fearing the sort of X10 signaling nightmare that most readers here will be familiar with I embarked on a lengthy process of unplugging modules to eliminate suspects, my prime candidate being the TM12 RF receiver as it’s generally to blame for any and all X10 problems in my house.
To cut a long story short, it all boiled down to my misunderstanding of how the light sensor in the MS13E works. I’d assumed that it was used to detect darkness purely for the purposes of deciding whether the PIR should trigger or not. What actually happens is that the status of the light sensor is sent as X10 codes, on the unit code one above that which was programmed in to the MS13E. For example, if the MS13E is on address A2 and it detects the onset of darkness, it will send A3 ON. Similarly when light returns, it will send A3 OFF. In my case, the MS13E was facing the light it was meant to be controlling, so triggering the PIR caused A2 ON to be sent switching the light on. The MS13E then saw that light levels had increased and sent A3 OFF, and in my setup A3 happens to be the downstairs light! The reverse happens when the MS13E times out. Have two MS13E units controlling the same light, and all hell breaks loose!
Annoyingly, there is no programmable way to defeat the light sensor in the MS13E, short of remapping the address codes so that the offending unit codes do not address actual devices, which frankly isn’t an option. Unless you have no other dusk/dawn capabilities, or localised light level changes are of interest to you, I recommend one of the modification techniques at the Home Automation Knowledge Base. Personally I’ll be modifying the circuit to prolong battery life.
In summary, the MS13E is an excellent little device which does its job well, with some minor irritations. Chief amongst these is the inability to disable the light sensor, no option for not sending an OFF code after the timeout period, and no provision for corner mounting. House and unit code assignment and feature selection is achieved using the minimum number of buttons possible. Whilst fiddly this now seems to be the de facto standard.
Approximate Price £42.00. Available From Lets Automate
Want More? – Follow us on Twitter, Like us on Facebook, or subscribe to our RSS feed. You can even get these news stories delivered via email, straight to your inbox every day
Be the first to comment on "X10 Motion Detector (MS13E) – Review"